
The tie knot is a visual focal point in your outfit, which helps the viewer to focus on your face. Because of that, it’s important to know how to tie a knot that will flatter your appearance. Whether you are just getting started with tie knots or you need a little refresher because you’ve got an upcoming interview, this guide is for you.
Choosing the Right Tie Knot
First, I would start with a shirt style and a collar because once you have that, it’s easy to choose an accompanying tie knot. This is because the tie knot is something that’s up to you, versus the shirt collar is something that you have and you can’t just change. Think about the shirt collar as a partner to your tie knot; the tie knot is flexible, the shirt collar is not. If you have a really large Windsor knot with a classic collar, it will look mismatched. Likewise, if you wear an Oriental knot or a four-in-hand knot with an extreme spread collar, it looks off too, because you see a lot of the tie on the side of the knot.

On the flip side, if you want your tie knot to look good with your collar, you have to make sure that the knot fills up the space that is left in between your collar. Ideally, you should just see the knot, there should not be any excess band that is visible on the side. Likewise, the knot shouldn’t be so big that it’s partially covered up by your shirt collar. A little bit of cover-up is okay, but if you have a huge cover-up it just looks odd.

Choosing the Right Tie Knot Size
The tie you choose will have a huge impact and how your knot looks. If you choose a thinner tie, you will get a thinner knot, a thicker tie will result in a thicker or bigger knot. Of course, that’s not the end of it. It also depends on what type of tie knot you choose. A thin tie paired with the Oriental knot will yield a very tiny tie knot. On the other hand, if you have medium-thick tie, maybe you go with a Kelvin knot, because you go with a loop once around which makes your knot a little bigger. Ultimately, it’s all about keeping the balance.

There’s no absolute right or wrong, there’s just the right size tie knot for your shirt collar. As you build up a shirt wardrobe over time, you will understand what type of a knot size you need for each shirt collar, and then you can pick the right tie size. Maybe one day, you’ll want to wear a full Windsor; other days, you’ll want to wear a four-in-hand. In either case, you’ll be able to grab the right tie at the right time.
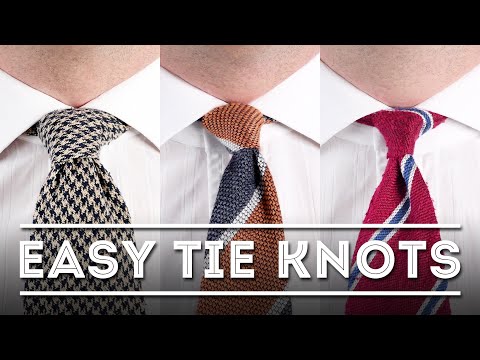
The Three Easiest Tie Knots – The Oriental Knot (AKA The Small Knot)
Now that you know how the shirt-collar, the tie thickness, and the tie knot work together, let’s take a look at the three easiest tie knots. In general, for the Oriental knot, I would say get a more classic collar with a medium spread, definitely not a wide spread, because it’s a very small knot. Because of that, it’s also great to be worn with a collar pin or a collar clip, as it doesn’t take up too much space.

Note: be sure to watch the video at the top of this post to better understand the steps we’ll outline here!
Follow these steps to form the oriental knot:
- First, the slimmer end has to be on your right side, the wide end has to be on your left side. Position the right end so it’s much longer than the short end. Typically, for me, the short end ends about a hand width above my pants’ waistband.
- Cross the slim end over the wide end with the seam facing up. Pinch the intersection of the two sides with your left index finger and thumb.
- Fold the wider end over the intersection and your pinched fingers. Wrap it around and pull it snug.
- Take the wide end and insert it between the gap between your collar and the tie. Pull it through, and then insert the tip of the wide end into the top layer of the knot.
- Hold the knot while you pull it all the way through gently. Before finally tightening the knot, make sure there’s a little pinch of fabric on top of the long part of the tie so you get a dimple.

What’s a tie dimple? It’s a little pinch in your tie that is an intentional crease. It’s there because it breaks the light and makes it look elegant in a certain way, highlighting the asymmetrical nature of your tie knot and the nonchalance of your outfit. Once the knot is tied, adjust the dimple and pull up the knot. Just pull on the shorter end with your right hand while holding the tie knot with your left hand.

Some people like to put the slim end through a keeper. Personally, I prefer not to do that, because it’s a little more casually elegant that way. If you want, you can also wear a tie bar with it so your tie stays straight all day.


The Four-In-Hand Knot
This is probably one of my favorite knots because it’s asymmetrical and it’s very simple to tie, so it works with most medium-thick and thicker ties. It’s also my knot of choice for knit ties, because anything bigger is just too dramatic. Even though there are dozens of possible tie knots out there, the four-in-hand is probably the most popular around the world. It’s very similar to an Oriental knot, but it starts with the seam side facing down towards your chest or neck. Just like the Oriental, it’s also great for collar pins and collar clips, because it’s very small, too.

Here’s how to do it:
- First, drape the tie around your neck with the wide end on the left side and the thin end on your right side. Again, you want to adjust the length so the slim end is shorter. Typically, it ends about a hand width above my pants’ waistband.
- Cross the wide end over the slim end with the seam facing towards your chest.
- Pinch the intersection, and wrap the wider end once around, 360 degrees. This will form an opening over your left index finger. You can pull the wide end from behind; pull all the way through, and then put it through that hole you just created.
- With your right index finger and thumb, hold the knot and with your left hand, and pull the wide end through that little knot.
- Before finally tightening the knot, pinch the top part so you get that desired dimple, then pull the knot tight and ultimately, hold it with your left hand. With your right hand pulling the slimmer end, wiggle it up so it fits neatly in the desired collar space.

You don’t want it to be more on one side or the other, you want it right in the middle, so it’s not overlapped and it looks neat. Again, this is an asymmetrical knot, so depending on the tie you have, it may look more asymmetrical, but this is a desired part of the look.
The Kelvin Knot
The Kelvin knot is basically an Oriental knot that’s more voluminous because you wrap the tie around once more, thus giving you a bigger knot. The method is similar to the first one, and you can follow it easily through the steps below.

- Again, drape the tie around your neck with the wider end on your left, the shorter end on your right. Also, adjust the length so the slimmer end is about a hand width above your pants’ waistband.
- Cross the slim end over the wide end and pinch it with your index finger.
- Fold the wider end over the intersection of your pinched fingers, go once around, and pull it really tight. Once again, pinch that part with your thumb and index finger of your left hand.
- Wrap the wide end around once more, come through the back, and pull it up gently.
- Take the wider end, put it through the hole you just created, and pull it down, while you have your left hand holding the knot. With your right hand, pull on the wider end and pull it through. It’s important that you pull that wide end through only the outer, top loop, not both–otherwise, your knot might look odd because there will be two layers that can be seen.
- As before, make sure there’s a little crease in the end so you get that desired dimple, and then once the knot is tight, pull it up.

A Note on Tie Length
Once the tie is fully tied, you ideally want the wide end and the slim end to be exactly the same length, ending at about the middle of your belt buckle. Sometimes, it can be a little shorter, sometimes it can be a little longer.

If you’re a tall guy and you have a long torso, you will need a longer tie. If you’re a shorter gentleman, you need a shorter tie. We at the Gentleman’s Gazette and Fort Belvedere understand that different men need different tie lengths, and so all of our threefold ties come in short, regular, and long lengths, so you can find the right tie for your needs.

Conclusion
Now that you know the three easiest tie knots and you understand how to pair them with your collars, you’re ready to go to a cocktail night, to a business interview, or any other occasion where a tie is required or desired. Happy tying!
What’s your favorite simple tie knot, and how do you wear it? Share with us in the comments below!
Outfit Rundown
In today’s video, I am wearing a white dress shirt with a medium to classic spread collar. I’m combining it with an interesting tie in turquoise and orange with a diamond pattern that is printed by Fort Belvedere which you can find in our shop here. It’s tied with a Kelvin knot which perfectly fills out that space of my collar.


It’s then paired with a vintage cashmere blazer from Sulka, it is navy, has patch pockets and white mother-of-pearl buttons. The pocket square picks up the white color of the dress shirt and has a navy-blue ex cross stitch which ties the whole outfit together but highlighting the handwork with that unusual cross stitch. It’s also from Fort Belvedere.
The pants are a grey Prince of Wales check with a red over plaid, they’re vintage Polo and they pick up the red color of the tie. My shoes are burgundy or ox blood penny loafers and I’m combining them with a burgundy red belt with a silver palladium plated buckle as it goes well with the red silver combination of my ring.
Excellent and helpful article, thanks. My father taught me the Shelby (or Pratt?) knot which I used for years… until I tried the four-in-hand (with a dimple, of course..) and never looked back… I find it simple, debonair and easy to make.. and it has a je ne sais quoi…lol.
Not that other knots are not worth considering, but they aimply are not my cup of tea…
Never bought an open shirt collar and never will.never bought a pair of bell bottoms pants….same reason.let’s go back to the older days.men dressed up with all the products they had.my dad would never leave the house ,in the 60’s without a white shirt and tie.a real shirt.shirts of today are ridiculous.let’s go back where men were men.clean white shirt,nice tie,pressed pants,polished shoes.
Agree totally, todays shirts barely cover the seat, making them a disaster zone when you bend over, a good shirt fits snugly at the neck and chest and COVERS the seat!
Enjoyed this article. I sometimes think you get a little fussy about some particular elements of style, but generally you are a solid reference for newbies. Regarding tie knots, l love the four in hand for its simplicity, versatility and that its asymmetrical. It just adds a casual flair. I also refuse to worry about the length of my tie! Watch the Italians; skinny end of the tie longer than the wide end? Who cares? It’s all about the knot, the dimple and the style. Not for formal or business occasions of course. Keep up the good work!
Great solution to a knotty problem that ties it all together.
My favorite knot is the Kelvin Knot. I like The Oriental Knot, I like the Four In Hand Knot, Can you please do a video about other knots.
Thanks for sharing, Jacob! We’ll add your suggestion to our list :)