For true menswear enthusiasts (like us here at the Gentleman’s Gazette), hats are a wardrobe staple. A hat serves both a functional and an aesthetic purpose, and makes outfits all the more stylish. If, however, the shape of a hat’s crown isn’t providing you with the desired effect, fear not–using the following techniques, you can easily reshape your classic hats from the comfort of your home!
This is the second of a two-parter on hats: the first covered seven tips on how to wear traditional hat styles with confidence. So, if you’ve bested any self-consciousness about hat-wearing and are now a regular wearer of classic hats, you may occasionally find that one of the hats in your collection might look better with a different shape to its crown.
Hat Crown Shapes: A Brief Refresher
We have covered crown shapes before in our guide to the anatomy of men’s hats, but let’s have a brief refresher. Of course, the crown is the part of the hat that covers and conforms to the head.
The teardrop crown shape also called the C-crown looks like a teardrop if you’re considering the entirety of the hat or like a letter C if you’re looking primarily at the back portion of the crown. The center crease or center dent-style features one central crease that runs down the middle of the crown typically at a depth of about 1 to 2 inches.
The diamond crown is a slightly less popular shape than the more commonly seen teardrop, but it was a popular style for a time in the 1940s and it’s a little bit wider than your typical C-crown shape.
The telescope crown (also known as the flat top) is seen on everything from top hats to gambler hats, straw boaters, and pork pies. This crown shape either features a totally flat top of the crown or a slight lip that runs around the perimeter of the crown at a very small depth.

And finally, we have the open or round crown which simply refers to the natural shape of the crown before it’s shaped into a different style. Also, the crown can be left round for some styles such as the bowler or derby hat.
Shaping A Hat At Home
What You’ll Need
Hat
First, of course, you’re going to need a hat. You’ll want to use a felt hat preferably a soft or crushable style. Crushable hats are designed to take a bit more wear than their stiff counterparts, which can be lacquered or otherwise coated. As such, crushable hats are the easiest ones to reshape at home.

While you might be able to remove a minor imperfection in a stiff hat like a Homburg and you could preserve the open crown in a bowler hat, we would strongly recommend that if you need a stiff hat reshaped you consult a professional haberdasher or milliner.
Source of Steam
Next up, you’re going to need a source of steam. In addition to your hands, steam is the primary tool you’re going to use to reshape a hat. The heat and moisture will work their way into and amongst the felted fibers, loosening them up and getting them ready for reshaping.
Dedicated hat steamers are used by manufacturers and garment care professionals, and they can be found online, though they’re generally pretty pricey. And while a standard garment steamer could work, steam output generally isn’t going to be forceful or concentrated enough to penetrate the fibers of a felted hat.

As such, the easiest appliance to use in the home is a stovetop tea kettle; not an electric model. Of course, kettles generally whistle, so you’ll probably want to put in some earplugs or be alone or isolated in your home, and if you’re in a small or not particularly well-soundproofed apartment building, be careful as well.
Fortunately, the tea kettle I’m using has lost its whistle completely over years of use. So, it’s actually ideal for this job.
Source of Misted Water
You’re also going to need a source of misted water. To introduce more moisture in areas where steam doesn’t seem to be cutting it, having a spray bottle can also be helpful. While a large one could work, it will again probably be somewhat imprecise. Therefore, having a small fingertip model will be best.

If your hat has a leather sweatband, you’ll also want to have a paper towel or rag handy, just so that the sweatband doesn’t get saturated with water.
A Round Form
You’ll need a round form of some kind to open and shape the crown of the hat. Traditionally, hat blocks, which are also known as hat forms or bashing blocks, were carved from wood by a craftsman known as a block shaper.
For a truly bespoke hat, a gentleman’s head would be measured and a hat block created just for him while this artisanal trade has faded somewhat over the past century, traditional hat blocks are still available, not only in wood but also in materials like metal and plastic.

Vintage hat blocks are considered collectible by enthusiasts, and one advantage of a wooden hat block is that it can be re-carved to suit a new head shape unlike plastic or metal blocks.
Fortunately, you don’t actually need a dedicated hat block for this job at home; just something that’s round enough and tall enough to roughly approximate the shape of your head. A relatively round bowl on top of a cylindrical object should probably be fine. You could use something like a plastic bowl over a cookie jar or other household appliances.

And if you can’t find anything around the house that fits these dimensions, you can, of course, just use your own head as the form. If you do this, you’ll probably want to cut up a plastic grocery bag to put on your head as a moisture barrier. It may look a little silly, but after all, you are just in the comfort of your own home.
A Basin of Water (If necessary)
Finally here, for a hat that’s really been mangled out of shape, you may want to consider soaking the hat in a basin of water for a day or so before attempting the reshaping process and you may need to weigh the hat down if necessary.

Just be mindful that the hat doesn’t have a leather sweatband and use cold water to try to keep things relatively more colorfast, especially when dealing with vintage hats. Soaking a hat in a water basin should really be considered a last resort technique, and we wouldn’t recommend it for most reshaping processes.
The Hat Re-blocking Process
If your hat has a liner tipping inside of it, you’ll probably want to remove this before attempting reshaping so that the liner doesn’t stretch or tear in the process. This can typically be done fairly easily by flipping out the sweatband and cutting the threads that hold the liner in place with scissors or a seam ripper.

Liners can be reinserted if you choose, but personally, I find them to be a bit of a nuisance. So, I just leave them out of my hats after taking them out for reshaping.
Step 1: Boil Your Source of Steam
So to get started, you’ll obviously want to get your kettle on the boil.
Step 2: Introduce Moisture to the Hat
While this is happening, you’ll want to introduce some moisture to the hat ideally using your fingertip sprayer. Get things good and saturated but not dripping wet.

Step 3: Place Your Damp Hat in the Path of the Steam
Once your kettle is boiling and producing a steady stream of steam, you can take your damp hat and put it in the pathway of the steam. Make sure to work the hat around fairly thoroughly, getting both the outside and inside of the crown steamed up.
Step 4: Stretch the Hat on Your Round Form
Once the crown seems fairly malleable, you can stretch it softly but firmly over your round form to open up the crown and get it back to its default shape. Remember not to pull too hard here.

If the crown hasn’t opened up completely, you can simply repeat the process of introducing some mist, then some steam, and then force to open up the crown.
Step 5: Place a Center Crease in Your Hat
Once the crown is open, you can start by putting a center crease in the hat. Hit the crown with a little bit more water and steam and then you can use one finger to draw a line over the center of the crown.
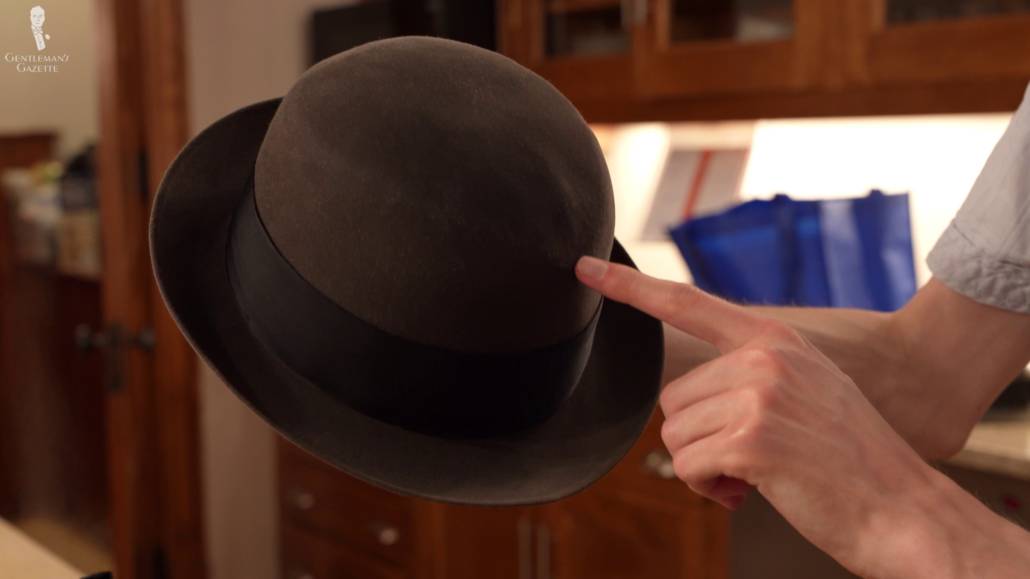
Check to make sure that things are actually centered using the small bow at the back of the sweatband found on many hats and just making sure that front to back things are lined up.
Step 6: Place Your Center Crease
If the line is centered, you can then use a small amount of pressure to make a center crease in the crown of the hat. Work slowly and carefully. You can start in the middle of the crown and crease outward or start at one end.
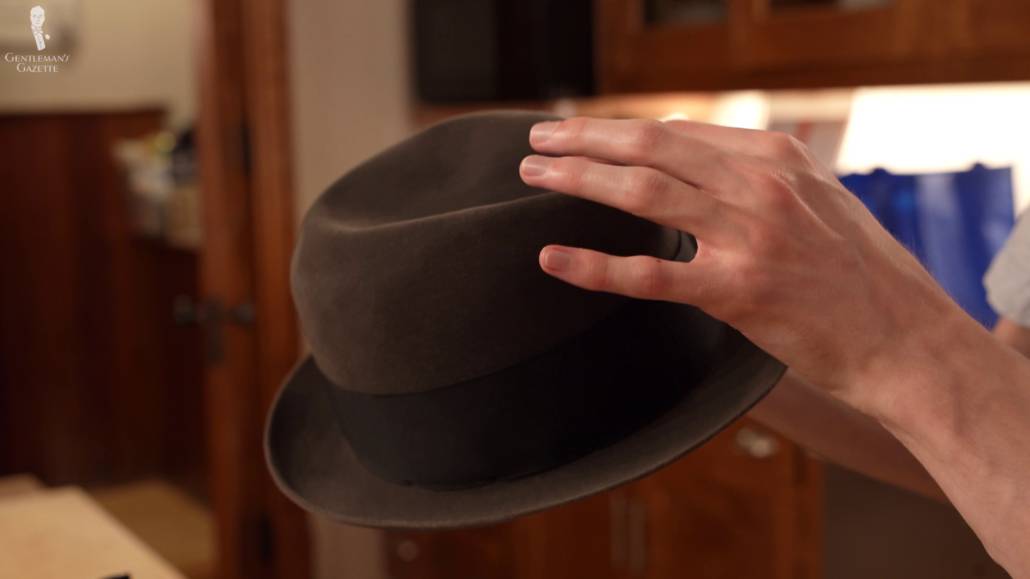
I often find that it’s easiest to start at the back of the crown and work my way up to the front. If you’d like your hat to have a center dent-style, you’re more or less finished.
Step 7: Pinch the Front of Your Hat
The only other thing you’ll have to do is make a pinch at the front of the crown to put two dimples in the front of the hat. Then hit it with a bit more water and steam, hang it, and you should be good to go with a center-dented hat.
We’re going to demonstrate a teardrop or C-crown shape here, though, so there are more steps involved.
Step 8: Begin Flattening Out the Crown
After using a bit more water and steam, you’re going to want to start flattening out the top of the crown. You can start at the back and, again, work your way toward the front creating that teardrop shape.
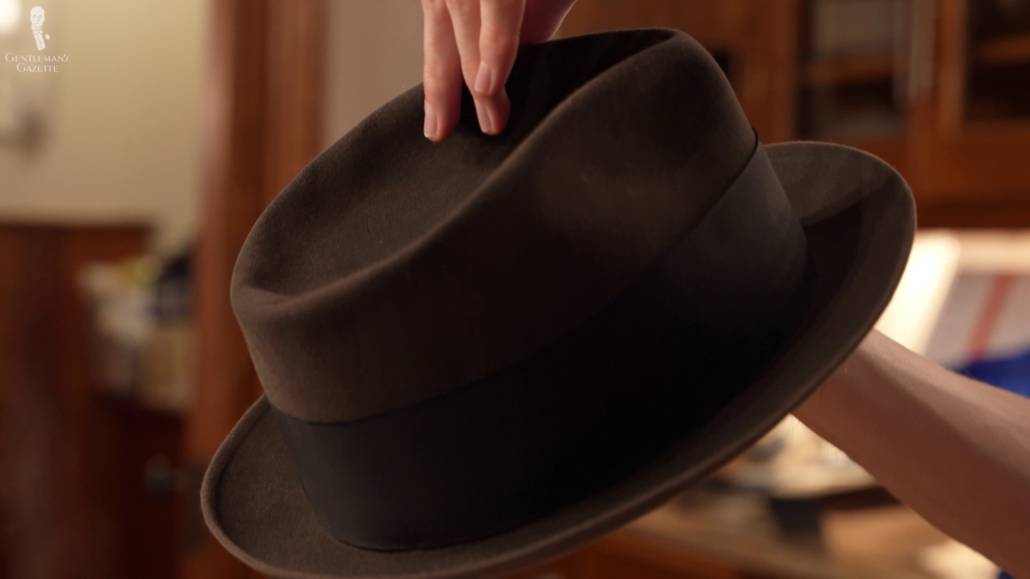
When viewing the hat with the brim parallel to the floor, keep in mind that, traditionally, the back of the crown will have a lower overall height than the front.
Step 9: Use Your Hands to Shape
Again, working gently and carefully, just shape the hat with your hands into the overall teardrop shape, working with water and steam as needed. There really isn’t a better way to explain this; your hands should hopefully just develop a feel for where they need to be as you go through the process.
Step 10: Add a Bubble Shape to Your Crown
Once you’re satisfied with how the top edge of the crown looks, making sure that it’s symmetrical side-to-side, then you can use either your round form or your own head to introduce a bit of a bubble back into the center of the crown. Then, again, hitting with water and steam every so often, make sure that the top edge of the crown forms a bit of a lip relative to this bubble.

Step 11: Hand-shape a Point in the Front
The last stage here is to hand shape the front of the crown into more of a defined triangular point again, making sure that you put in the two creases at the front of the crown as well. Give one more hit of water and steam to finish and that’s the end of the reshaping process.
Step 12: Leave Your Hat Undisturbed for a Few Days
At this point, you can just leave your hat undisturbed on a hook for a few days, preferably one that has a large and rounded point so as not to leave a bump in your hat.
Additional Pointers for Hat Reblocking
- First of all, you can raise or lower the overall depth of the crown using the center point as a guide. Remember that how much depth you want in a crown is partially determined by how tall the crown is, to begin with when it’s open and should also be determined, in part, by how the hat will look relative to your head shape when it’s finished.
- For snap-brim hat styles like fedoras and trilbies, it’s important that you don’t steam the front of the brim in a downward position. It should be left up so that you can snap it down when wearing it and snap it back up when not wearing it. Also, if you need to reshape the brim of a hat somewhat, you can do this but make sure to use a delicate touch in addition to water and steam.

Shaping Other Crown Shapes
Most of the tips we’ve gone over today have applied more exclusively to felted hats. However, you can use these same techniques to steam and reshape a straw hat, but you must be considerably more gentle. Use your hands to lightly coax the straw into shape as if you’re too rough the straw could tear.
Each of the crown styles we discussed today has its own level of difficulty when reshaping as well.
- The open crown is fairly self-explanatory, of course, as all you really need to do is use the round form to open up the crown of the hat.
- The center dent-style is the simplest, as we mentioned, followed by the teardrop or C-crown shape, which is really only slightly more difficult.
- The diamond crown is a bit more difficult than this and will require more hand shaping, especially to make sure that all of the sides of the diamond are roughly equal and that the hat is symmetrical front to back and side-to-side, not counting the pinches at the front and the positioning of the brim.

Resizing a Hat
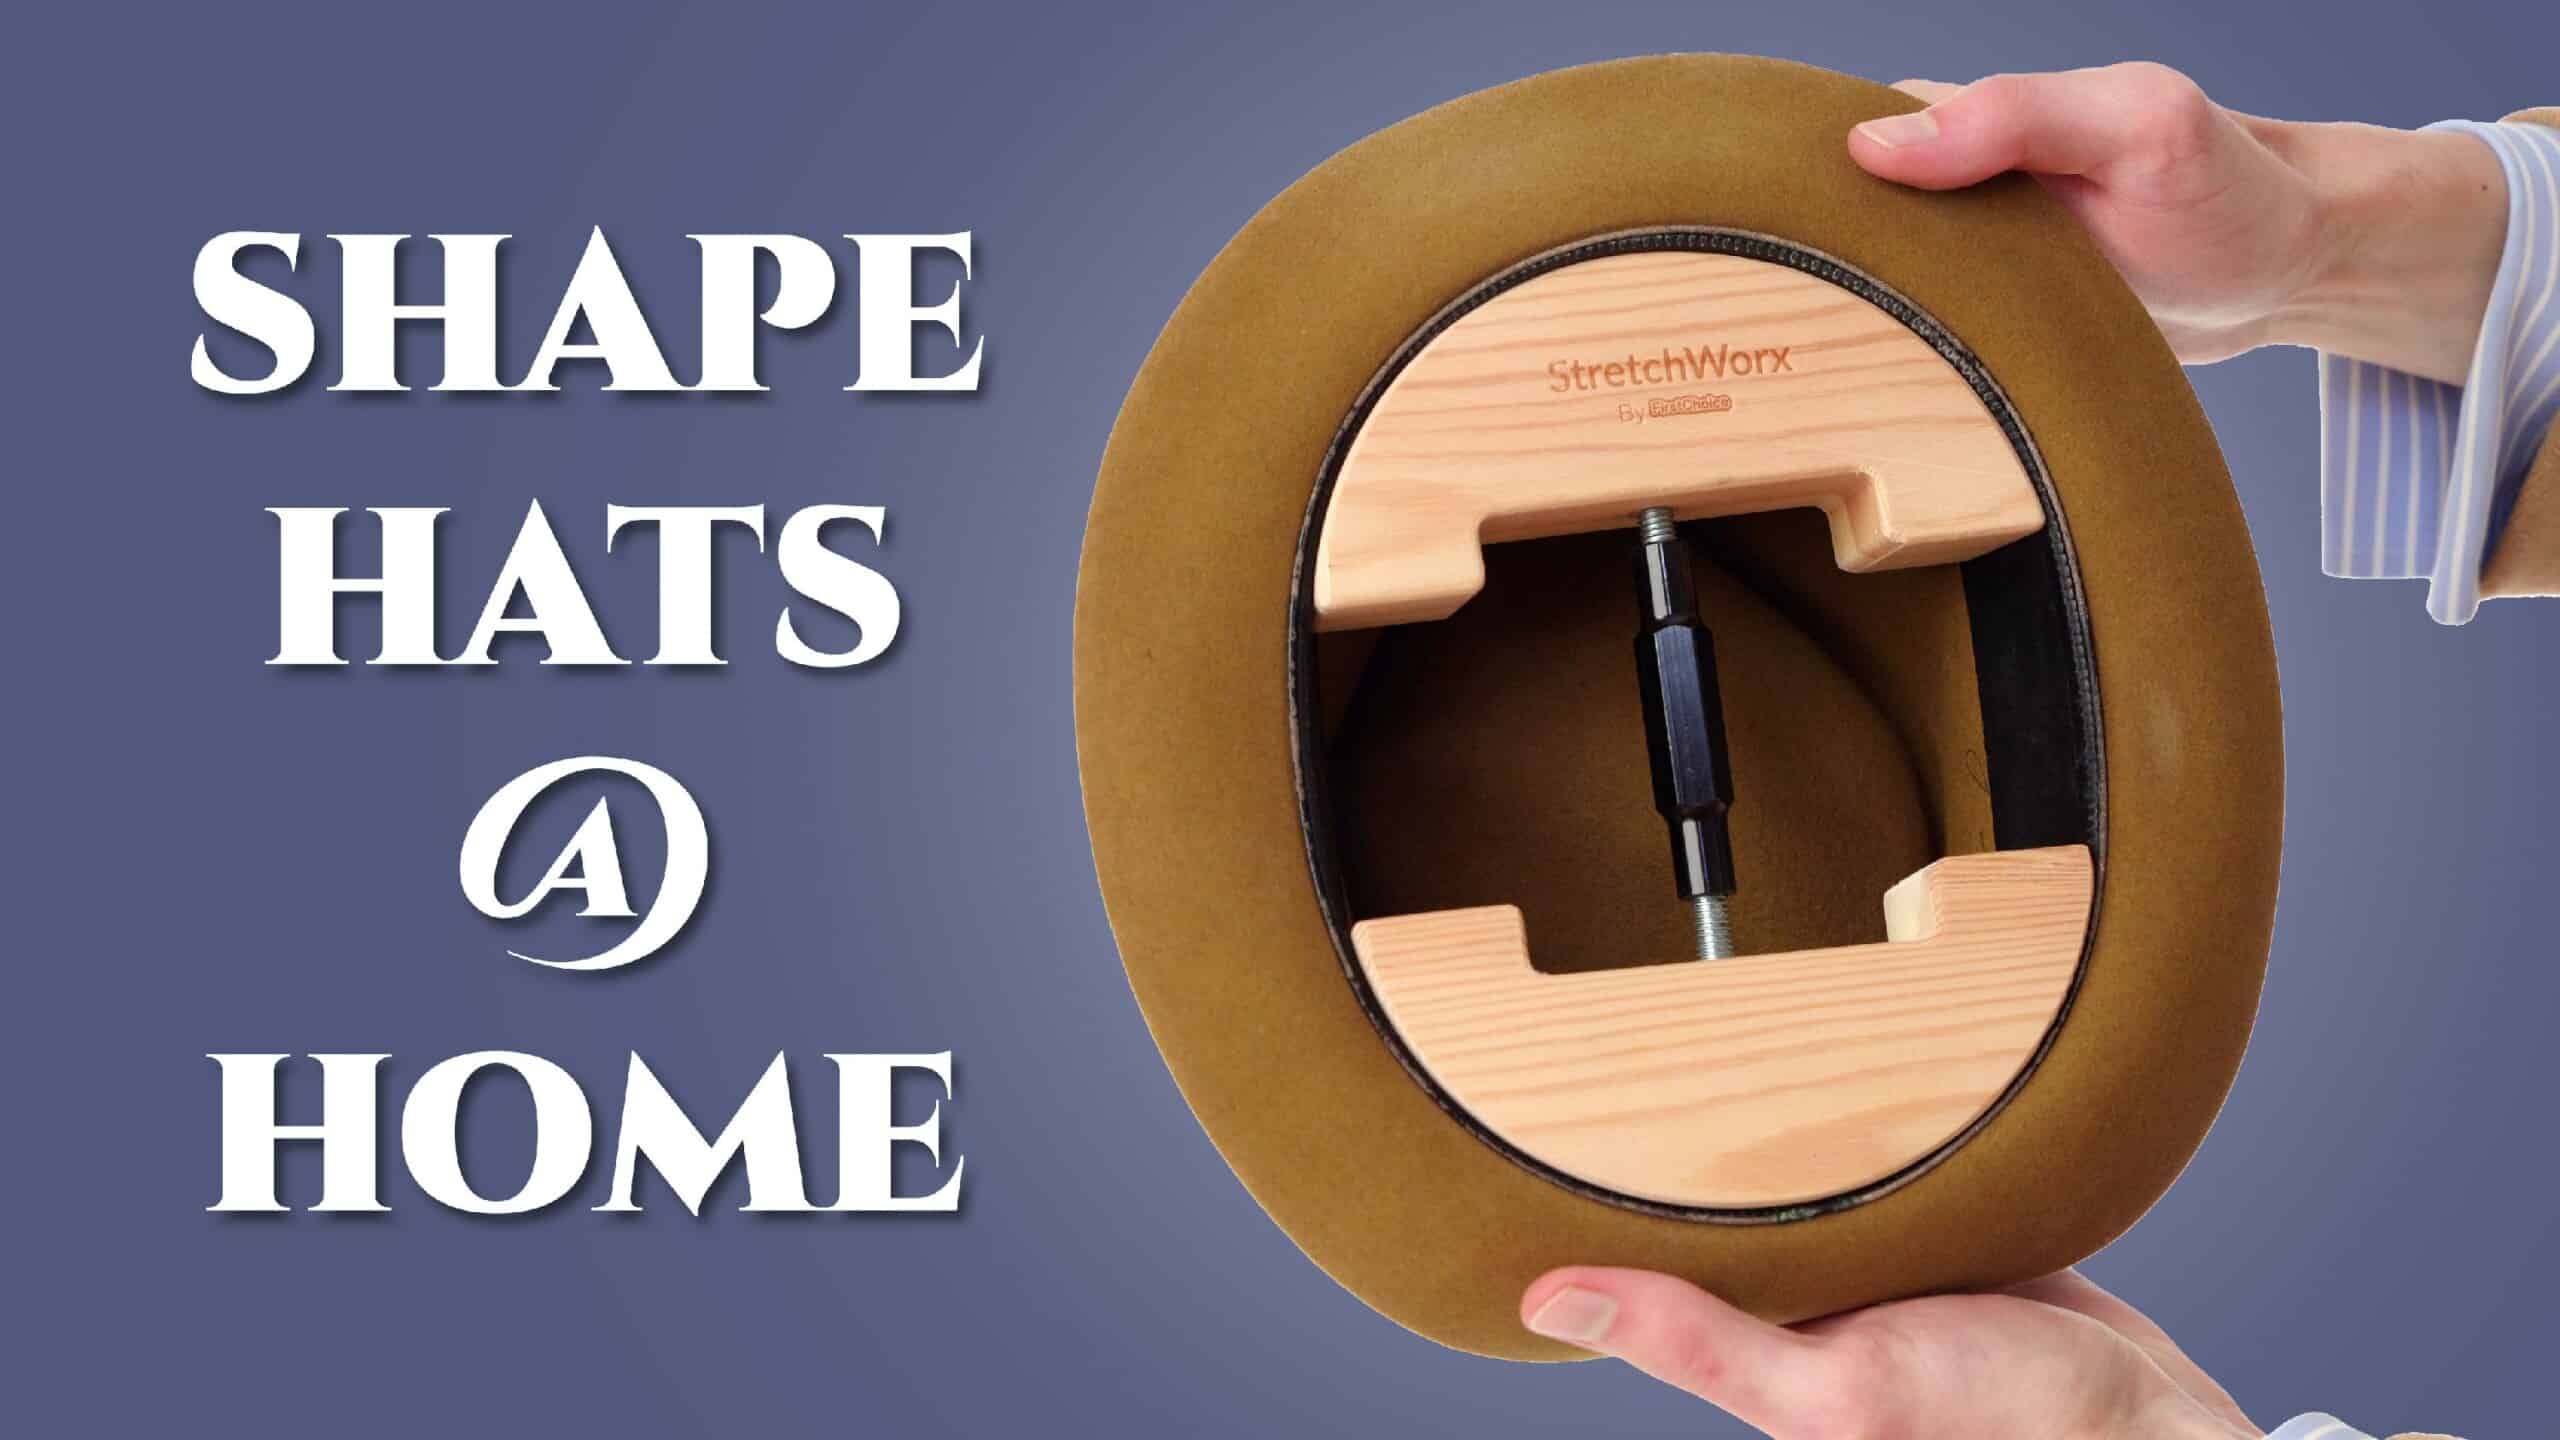
Finally here, in addition to using these techniques to reshape a hat, you can also use them to some extent to resize a hat while the hat is saturated with water and steam, you can use a tool called a hat stretcher, which is available online, to increase the circumference of the crown, but only by so much.
These stretchers use tension so putting too much on the hat may damage the sweatband or indeed the felt itself. This is why it’s important overall to know your hat size when purchasing hats, especially if you can’t try them on, so if you need to resize, it will only be slightly.

Conversely, making a hat smaller is a much tougher process. It involves a period of prolonged exposure to heat using an oven. We really wouldn’t recommend trying this process, unless you’re extremely confident.
As a bit of a horror story, That’s how I got the hat you’re seeing here into such poor shape, and even after copious attempts at reshaping, this is all the better I’ve been able to get it so far.
Conclusion
Using these methods, hopefully, you’ll be confident and or curious enough to attempt reshaping your felt hats at home. It may sound and seem difficult at first, but trust me, it’s actually a relatively simple process. I was actually somewhat shocked at how easy the process was when I first attempted it and I was pleased with the results I got that first time. Of course, like anything else, it might just involve a bit of trial and error. If at first, you don’t succeed, try, try again.

Good article.
Nice outfit, but i wonder who made your camel hair sport coat.
Many moons ago when I was involved in collegiate Rodeo, we would reshape the crowns of our hats using electric kettles. No stoves in our dorm rooms. I have a Copco electric kettle here that is shaped like a standard stove top kettle (and even has a whistle) that does that does produce adequate steam, though I agree the one shown probably would not.
Interesting! Thanks for sharing Alan! :)
Nice article.
Have you ever done one on cleaning hats? If not, I’d be interested in a hat-cleaning guide.
Western Wear outlets are a available source for felt hat brushes in fine camel hair. You can get black, brown and grey. Matching the brush color alleviates any broken bits of hair overlooked from looking like a six o’clock shadow. Stale bread works also and can soak up freshly spilled liquids.
Panama and straw are cleaned the same way as rattan furniture. Use the brush attachment to gently pass over everything being careful not to strike the fibers.
That’s an excellent idea! We’ll add it to our list of suggestions for future consideration, so stay tuned! :)
Having a hat on a hook is ok, but if your hat came in a “hat box” use that instead it will keep the shape and also keep it from getting dust when not in use. Yes, the box does take up more room, but i rather that than a out of shape crown or having to wipe or brush off the dust every time i want to use the hat.
Good point. Thanks for sharing, Richard!
In this case the guys at GG are truly “All hat and no cattle” – a cowboy’s insult to a man lacking substance. But in their case it’s a compliment of no BS referring to another by product of the beef industry. Again, If you manage to stain a felt hat a piece of stale bread works well to gently scrub the nap and absorb liquid. Also, in Western folklore NEVER leave a hat your bed. It’s an old sign the wearer is deceased.
Just about impossible to read read one of your articles with all the pop ups and ads interrupting.
Always enjoy all your hat posts and this one is very cute and practical !
You should add some brim work too
:)